Forms
Create, manage, and embed forms in your content. Forms support custom fields and actions that run after submission.
Overview
With Forms you can:
- Create forms with custom fields
- Add forms to content using the content builder
- Handle form submissions with custom actions
- Customize form rendering with Blade templates
Adding Forms to Content
To add forms to your content, follow these steps:
1. Create a Form
Create a new form in the admin panel under Forms. Add your fields, validation rules, and settings.
2. Create a Block Component
To use forms in the content builder, create a block component:
2a. Select the Form Component
Go to Components tab and select the Form Component.
2b. Add a "slug" Field to the Block
Add a new field with this configuration:
- Slug:
slug - Name:
form(or any descriptive name you prefer) - Type: Select
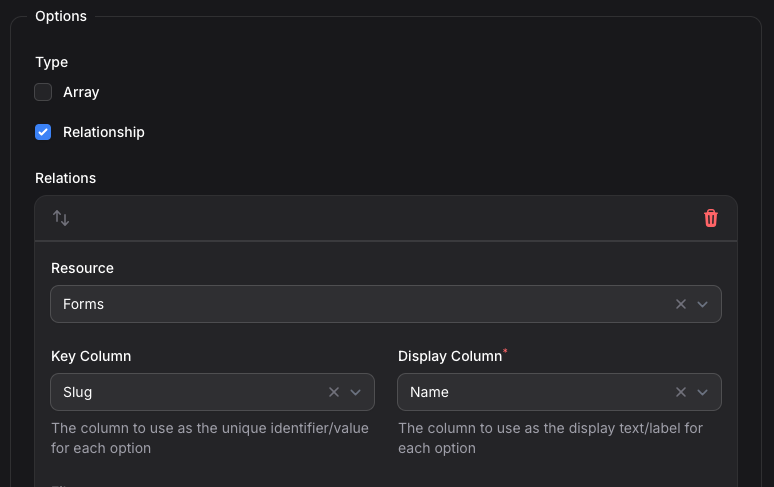
- Field Specific Options:
- Select the Relationship option
- Choose Form Resource as the related resource
- Set slug as the Key column
- Set name as the Display column
Don't see Form resource? Add the following to config/backstage/fields.php- config
// config/backstage/fields.php
    'selectable_resources' => [
        ContentResource::class,
        FormResource::class
    ],
After this setup, forms will be available in the content builder.

Custom Form Templates
Create custom Blade templates for your forms:
Template Locations
Create custom form templates in one of these locations:
resources/views/components/forms/{slug}.blade.php(form-specific template)resources/views/components/forms/default.blade.php(default template for all forms)
Available Variables
These variables are available in your form templates:
@dump($slug, $form, $content)$slug- The form's unique slug identifier$form- The complete form object with all fields and settings$content- The content object where the form is embedded
Default Template Structure
The default form template:
<div {{ $attributes }}>
    <form method="POST" action="{{ route('backstage.forms.submit', $form->slug) }}" enctype="multipart/form-data">
        @csrf
        <input type="hidden" name="content_ulid" value="{{ $content->ulid }}">
        @foreach ($form->fields as $field)
            <div>
                <label for="{{ $field->slug }}">{{ $field->name }}</label>
                <input type="{{ $field->type }}" name="{{ $field->slug }}" id="{{ $field->slug }}">

                @error($field->slug)
                    <p>{{ $message }}</p>
                @enderror
            </div>
        @endforeach

        <button type="submit">{{ $form->submit_button ?? __('Submit') }}</button>
    </form>
</div>
Direct Form Integration
You can also include forms directly in your Blade templates using the form component:
<x-form slug="contact" />Replace contact with the slug of your desired form.
Form Actions
Configure actions that execute after form submission:
- Send email notifications
- Redirect to a URL
The URL can use these variables:
{submission}= the encrypted ULID of the submission
Configure actions in the form settings. They run automatically after successful submission.